Firm/Business Manager Instructions

The Idaho State Bar Firm/Business Manager functionality allows firms to centrally manage license renewals for multiple attorneys. Using the Firm/Business Manager application, you can:

Create Firm/Business Manager Account 

If you previously registered your firm/business please log in to the application and move to the Add Members to Roster step below.

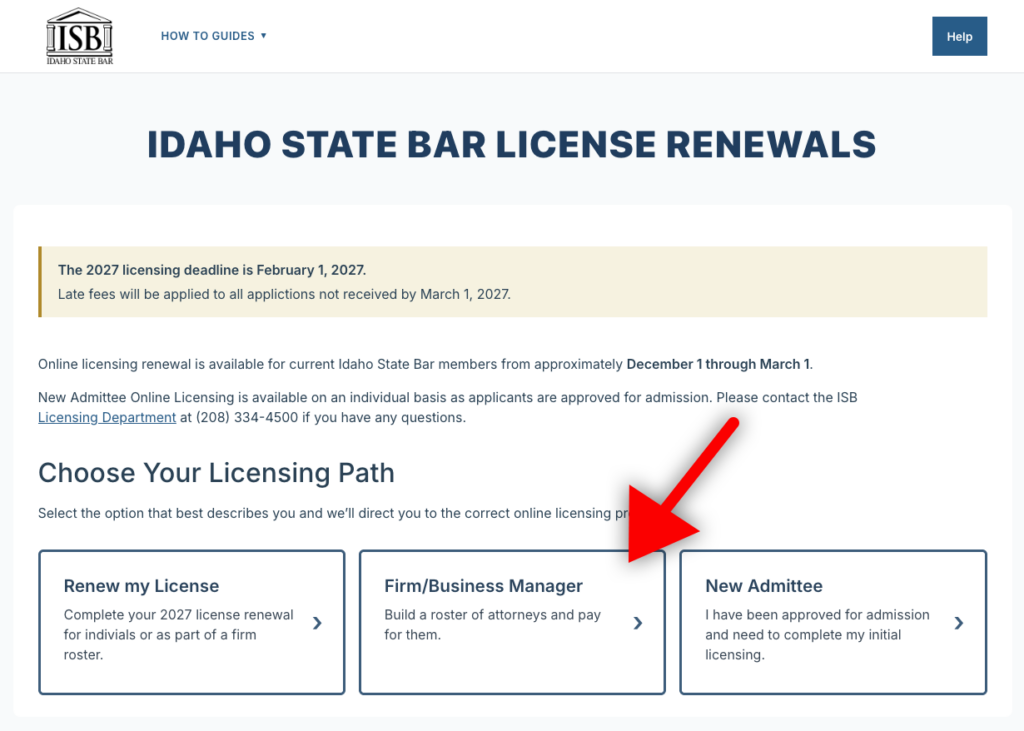
Go to https://tyleridaho.com/isb/ and click on the Firm/Business Manager button.

Click the “Manage Firm Renewals” button that appears to be directed to the application.

ISB home screen with arrow pointing to firm/business manager button

You will need to create an account for the accessgov.com system if you have not previously created one. See How to Create an Account for full instructions if you get stuck.

Create an Account screenshot

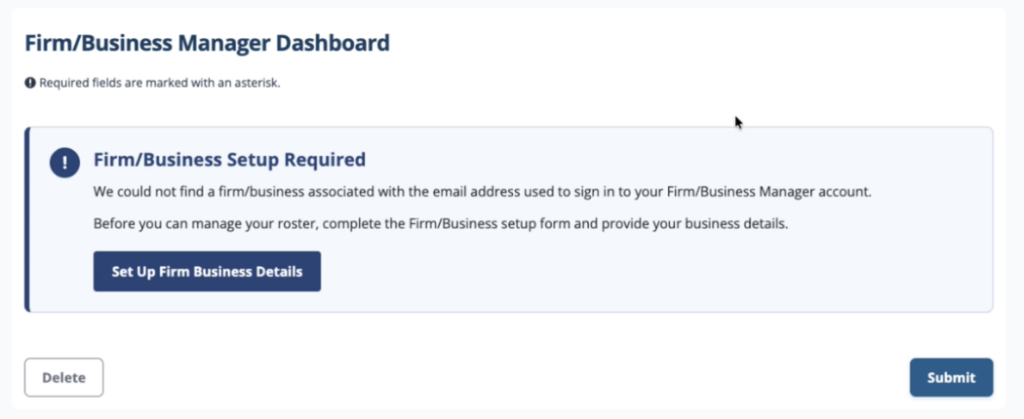
Once logged into your account, you will see a screen similar to the one to the right prompting you to set up your Firm/Business details.

Click the “Set up Firm/Business Details” button.

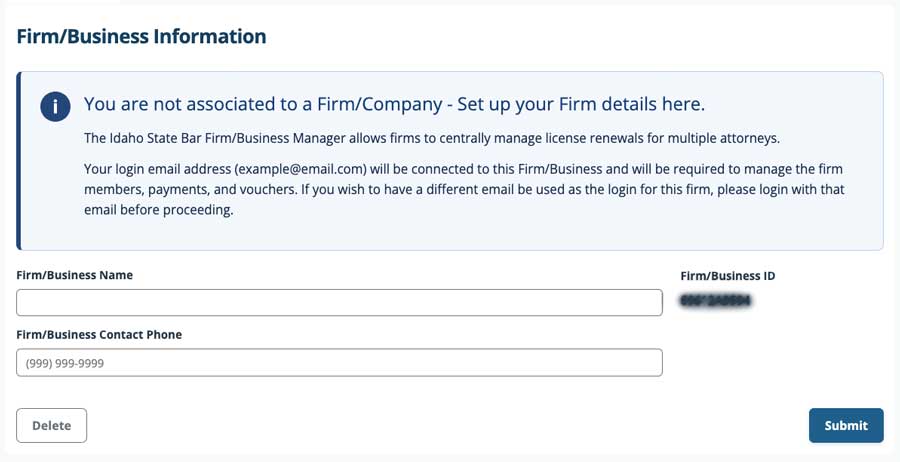
Enter the Firm/Business Name, Contact Phone number, and click the blue Submit button.

You will then be directed to your Firm/Business Manager Dashboard.

Firm/Business Information screenshot

Add Members to Roster

On the Firm/Business Manager Dashboard, you can view your existing roster members, add/remove members, and finally pay for roster members once their applications are complete.

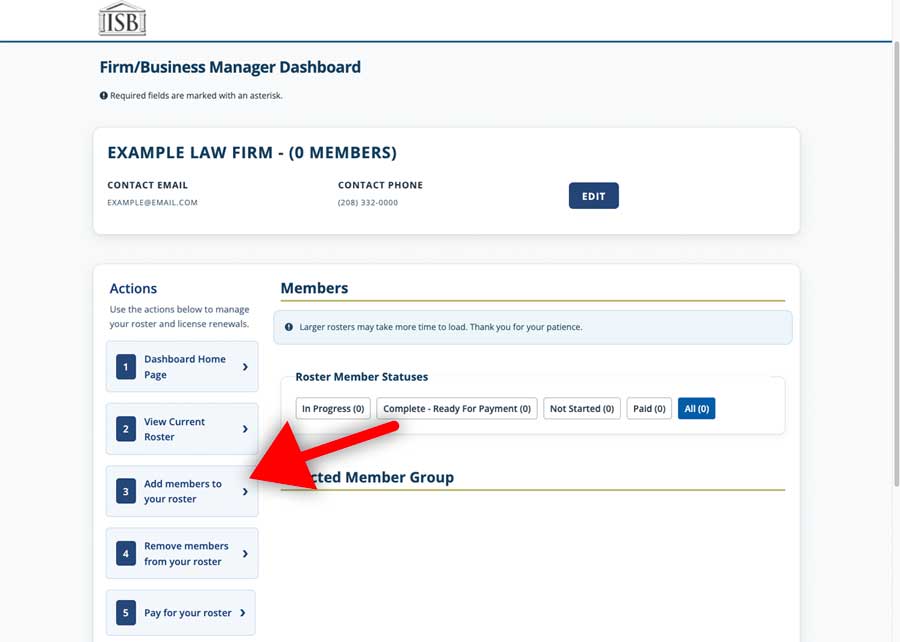
Click on 3. Add members to your Roster

Firm Manager dashboard screenshot

Add members one-by-one

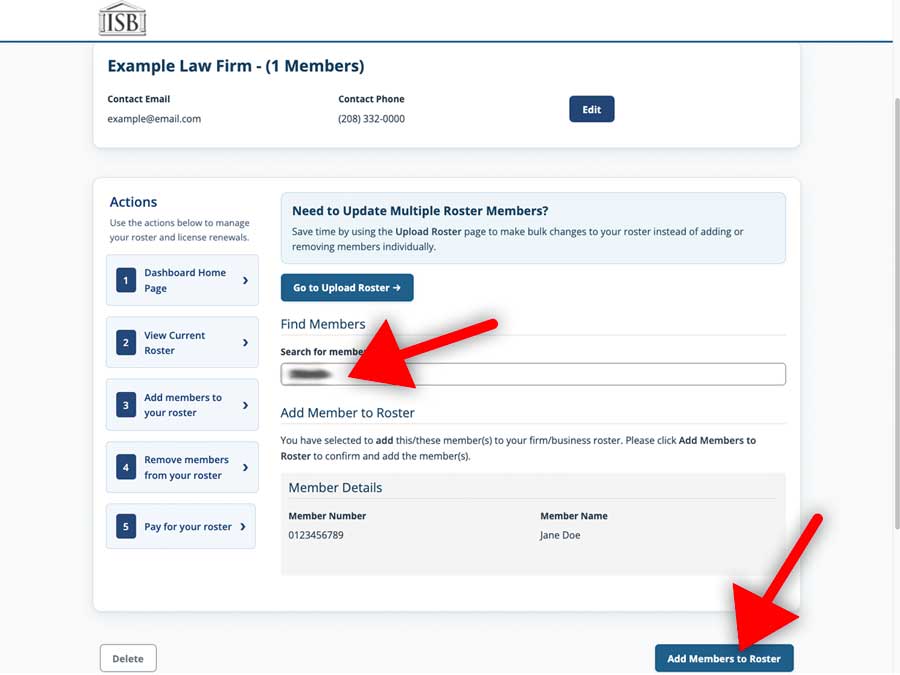
You can add members to your roster one-by-one by entering their Member Number in the “Search for member” field and clicking the “Add Members to Roster” blue button.

If you have a larger roster, you can save time by uploading a CSV file containing all of the Member Numbers – see the next section.

Upload your roster

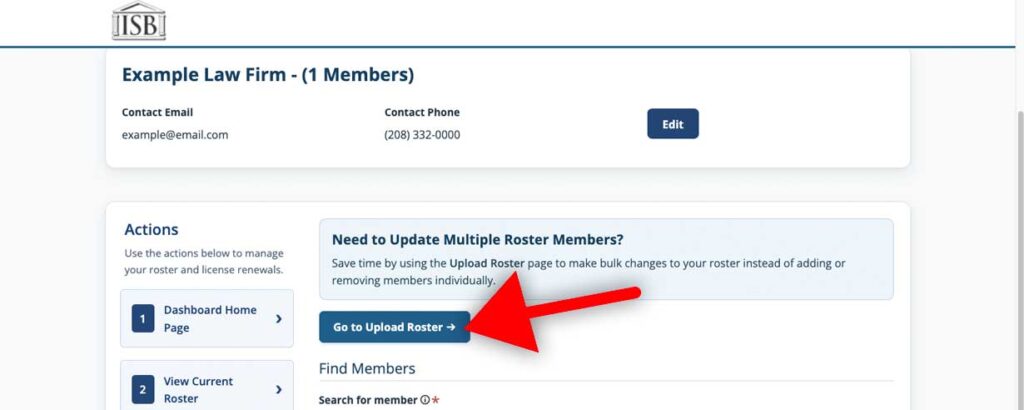
To add multiple members faster, click the “Go to Upload Roster” button.


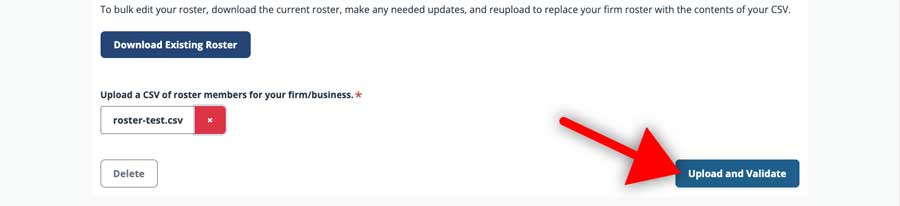
You can download the Example Roster CSV file to add your Roster Member Numbers, save the file as CSV, and click the Upload and Validate button.

Be sure to ONLY enter the Member Numbers (no other information such as member name is required) and be sure to keep the column name exact as follows: memberid

Once the file has been uploaded, you will see a Success message box you can close that box and wait for the upload to validate. Do not close or refresh this page while it is validating. The process can take awhile depending upon the number of members on your roster, so please be patient.

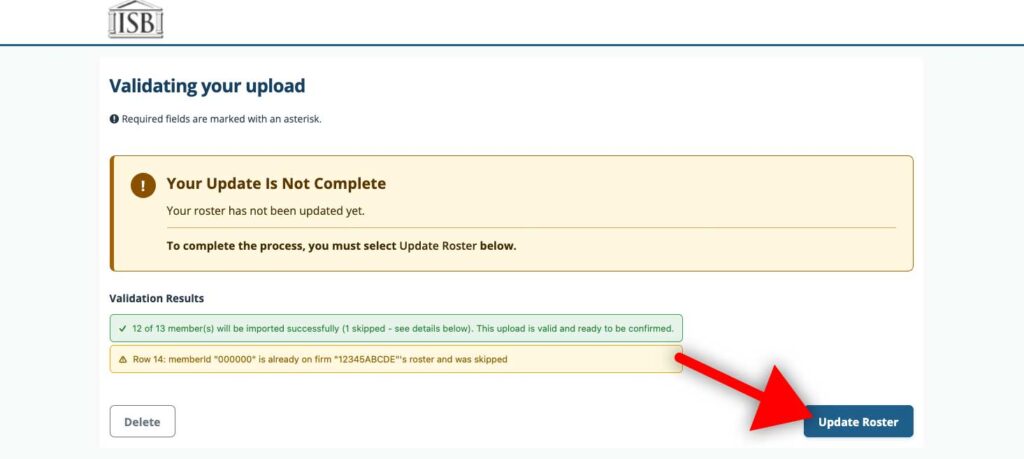
If your CSV file has any errors, you will see them and must correct the errors in your file and re-upload the CSV to continue.

Once you have successfuly uploaded your roster and it has validated, click the Update Roster button to continue.

screenshot of csv file
Example of how the CSV file should look
screenshot of the upload screen
Screenshot of the successful upload

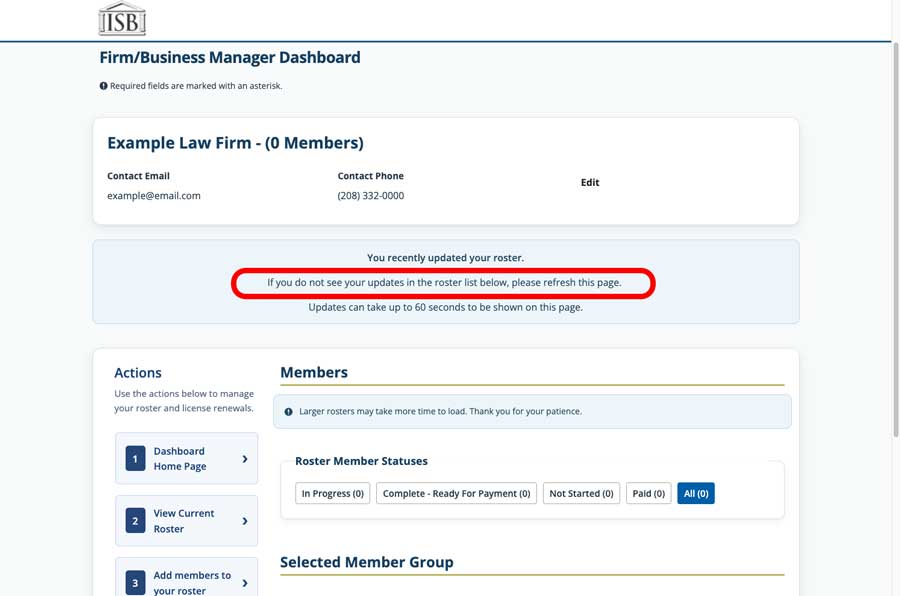
You will be redirected back to the Firm/Business Manager Dashboard. If your dashboard shows 0 Members still like the example screenshot to the right, please refresh your page.

screenshot showing refresh page message

Remove Members from Roster

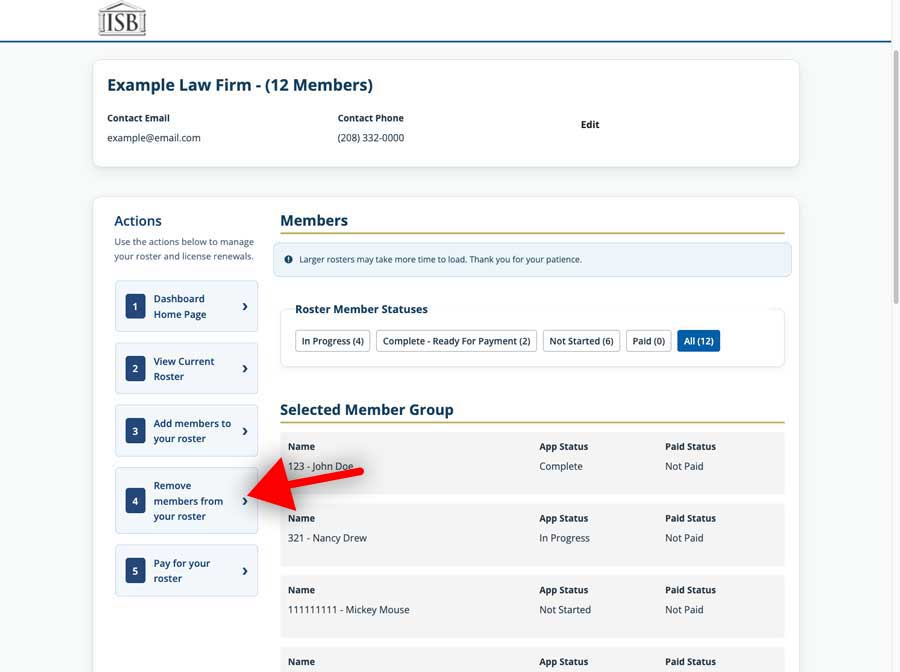
From the side menu, select 4. Remove members from your roster.


Screenshot showing the Remove Members from Roster button

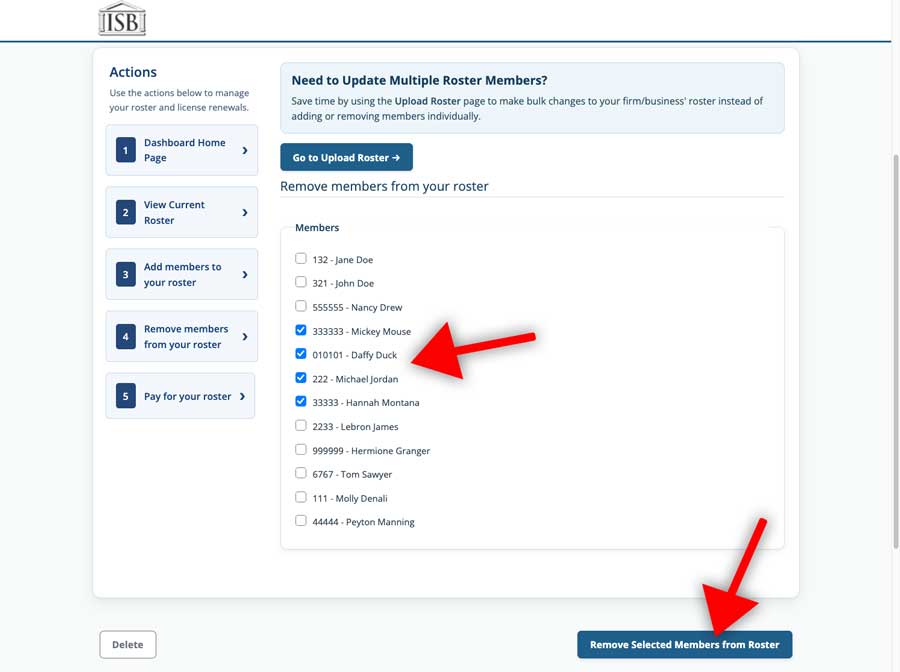
Remove members one-by-one

You can remove members to your roster one-by-one by selecting the box next to their Member Number and Name in the Members section of the page and clicking the “Add Members to Roster” blue button.

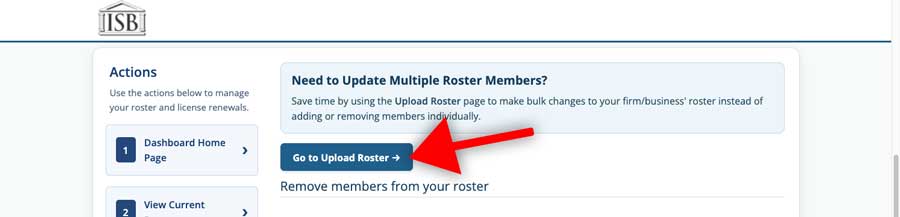
If you have larger changes to make, you can go to the Upload Roster page by clicking the “Go to Upload Roster” button.

screenshot showing removing multiple members

Remove members in bulk

If you have larger changes to make, you can go to the Updating your Firm/Business Roster page by clicking the “Go to Upload Roster” button.

Follow the steps on the page or see the Upload Roster instructions section above for additional details about the CSV.

Please note: This will replace your entire roster and cannot be undone.

screenshot highlighting the button

Manage for your Roster

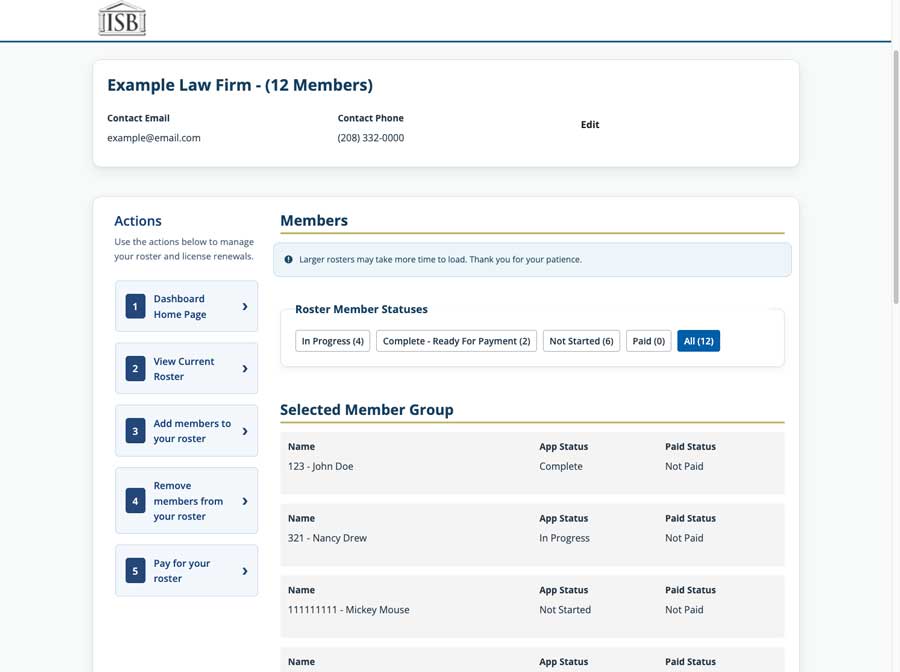
From the Firm/Business Manager Dashboard you will be able to see the status of each of your roster members.

Once you are ready to pay for the complete ones, move to the next step.

screenshot example of a roster with multiple statuses

Pay for your Roster

The members you want to pay for MUST complete their renewals before payment.

The Firm Make Payment application allows you to pay the renewal fees for multiple attorneys in a single transaction.

Preconditions:

  • Attorneys on your firm roster must have completed their renewal form but not yet paid.
  • Application status for each selected attorney should be “Completed” and “Unpaid”.

If you are not logged into the application yet, go to  https://tyleridaho.com/isb/ and click on the Firm/Business Manager button.

Click the “Manage Firm Renewals” button that appears to be directed to the application.

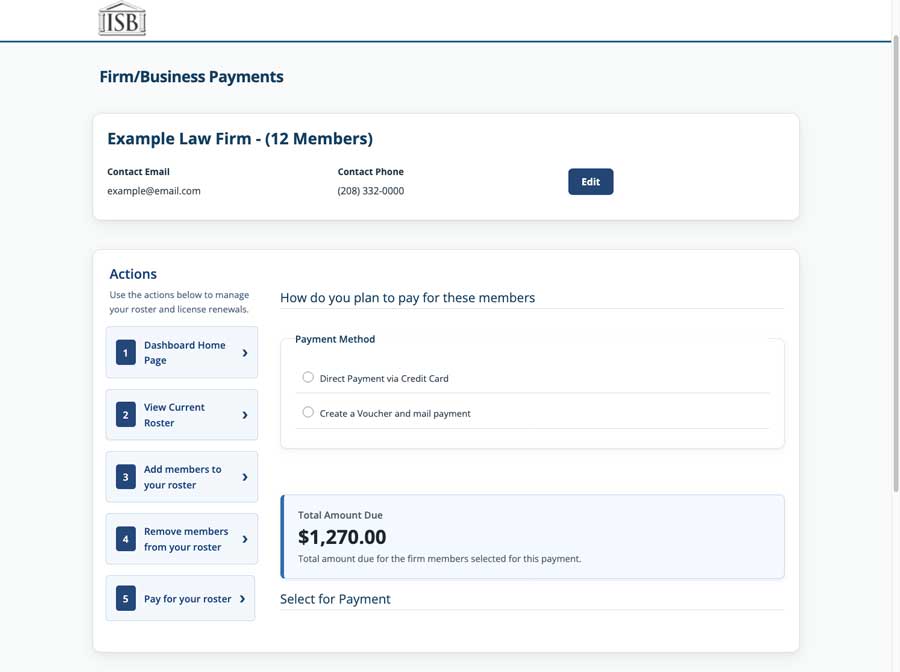
You will see the status of all the members on your roster on the dashboard. Click 5. Pay for your roster.

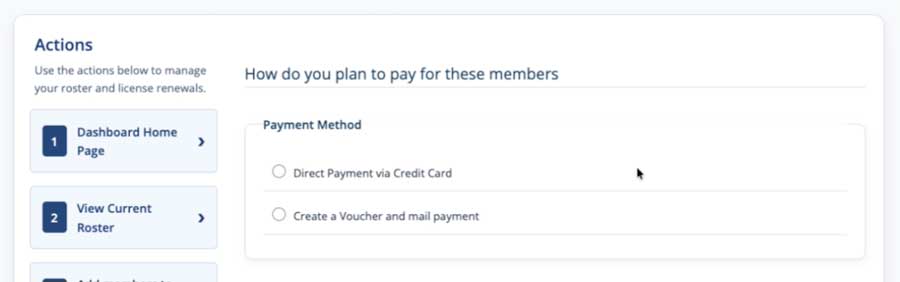
Next, you can chose if you want to pay for the members via Credit Card or Voucher and mail the payment.

Regarding Voucher payments, make sure every member you intend to pay for is included on the voucher before mailing your payment.

Firm/Business Payments screenshot

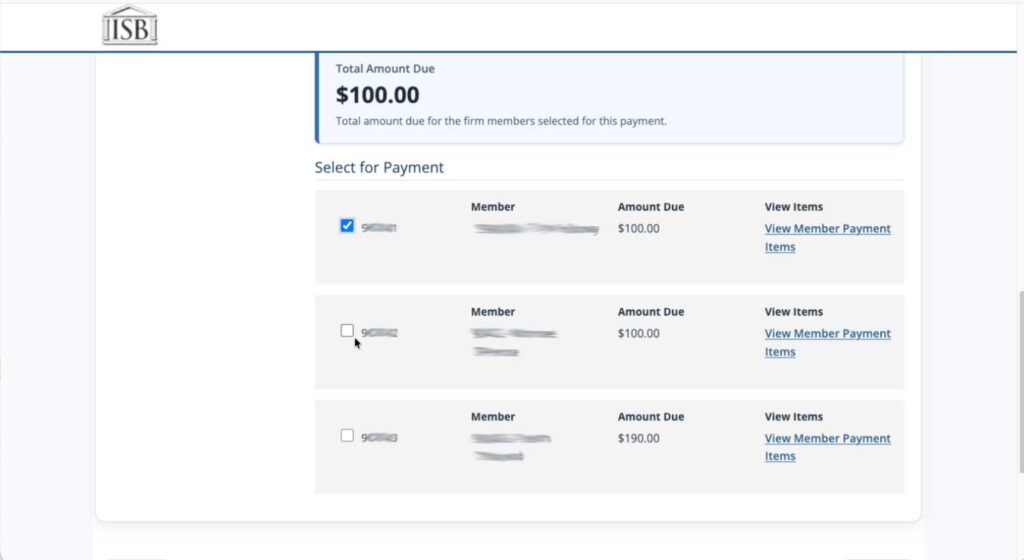
You can select the members you want to pay for by checking the box next to their Member Numbers. 

screenshot showing selecting members to pay for

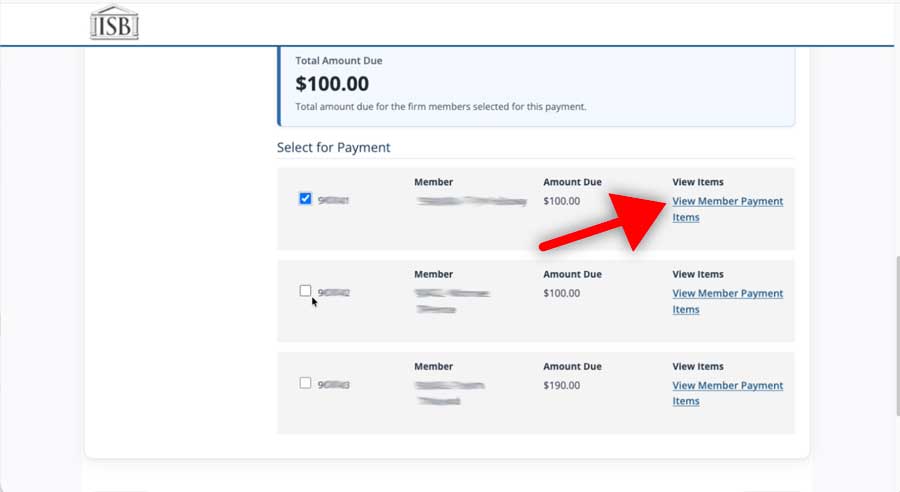
If you want to double check the payment items included with a member, click the link under “View Items” on the right side of the Select for Payment section.

To go back to the Roster Payment page when you are done viewing the payment details, please close the Roster Member – Payment Items tab in your browser or navigate back to the other tab you had open (Firm/Business Payments).

You can choose to pay with a credit/debit card or complete a voucher and mail it in with a paper check. 

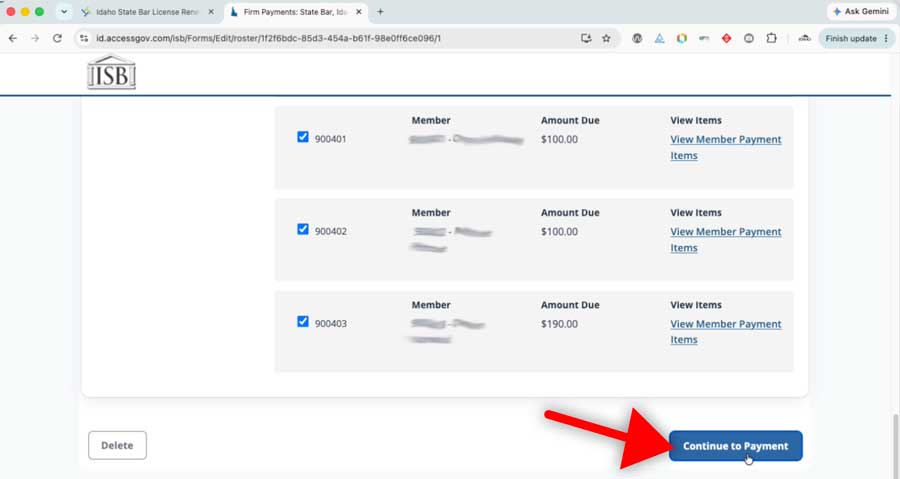
Check the box next to all of the members you want to pay for and click the “Continue to Payment” button.

screenshot highlighting the continue to payment button

Paying by Card

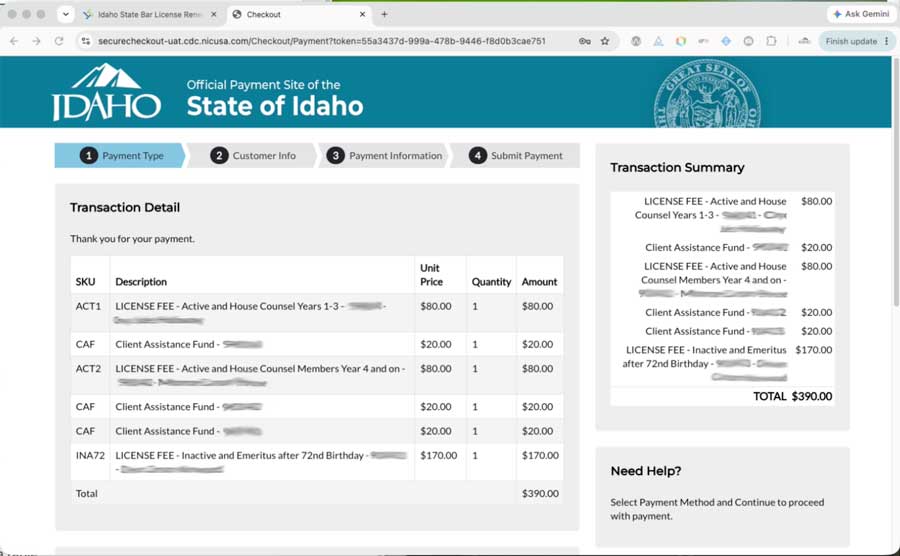
On the checkout screen, you will see a full list of transaction details. You can enter your credit card information and complete payment.

Please ensure you have the correct billing address and zip code for the credit card entered during the payment process.

A receipt will be emailed to you, or you can view your transaction history.

screenshot of the credit card checkout screen

Paying by Voucher

  1. Select all completed members you want to include on the voucher.
  2. Review your selections before creating the voucher.
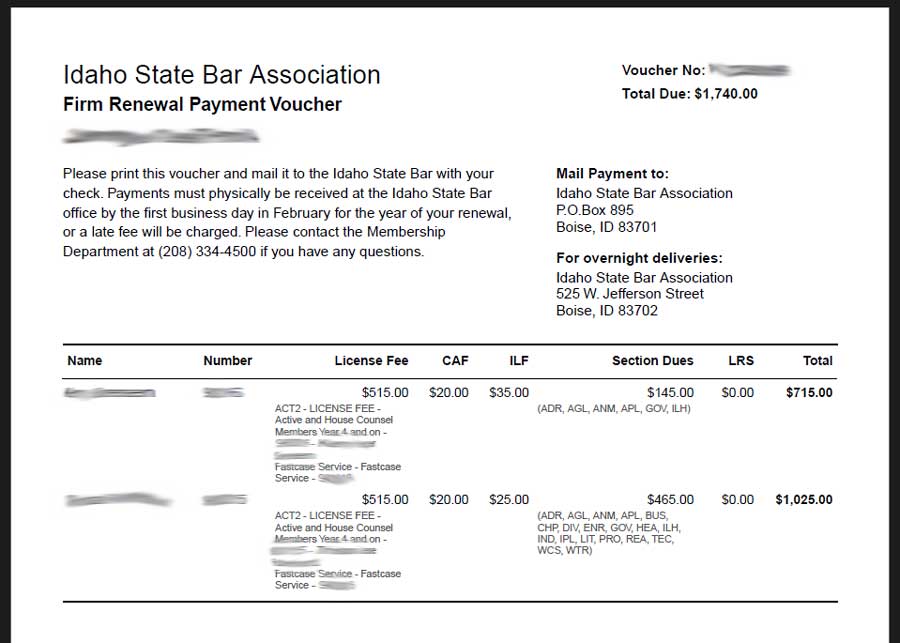
  3. Click Create Voucher to generate the voucher.
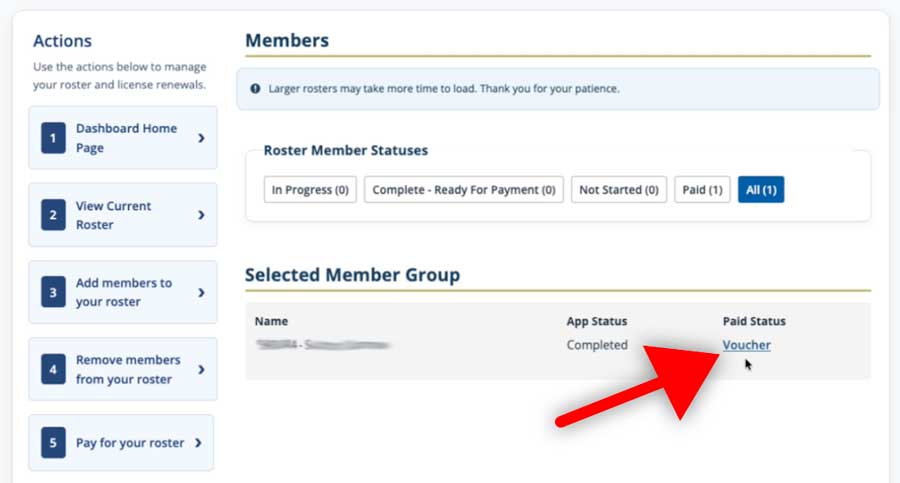
  4. Download and print the voucher by clicking the “Voucher” link under Paid Status from the Firm/Business Manager dashboard as shown in screenshot to the right.
  5. Mail the voucher along with your payment to the Idaho State Bar.

Please print the voucher and mail it to the Idaho State Bar with your check. Payments must physically be received at the Idaho State Bar address listed on the voucher by the first business day in February for the year of your renewal, or a late fee will be charged. Please contact the Membership Department at (208) 334-4500 if you have any questions.